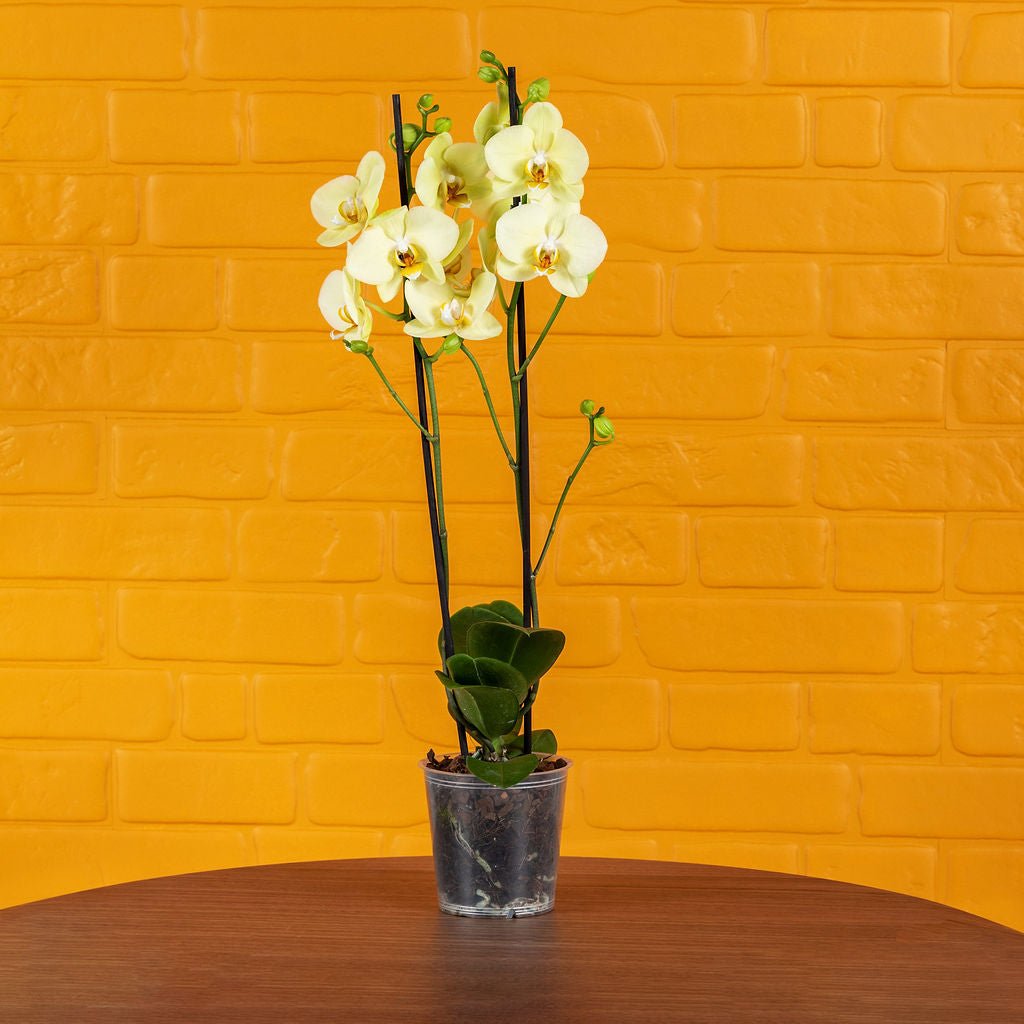



Once you've mastered the basics of orchid care, the next step is learning to read your plant.
Phalaenopsis orchids are remarkably good at showing you what they need. Their roots change colour as they absorb and lose moisture, their leaves and new growth can tell you how well they're growing, and even the way a flower spike develops can help you decide what to do once flowering has finished.
At Love Orchids, we've been growing Phalaenopsis orchids for over 20 years. While they don't need complicated care to thrive, understanding these smaller signals can help you move beyond simply following a care routine to recognising what your individual orchid needs.
In this guide, we're sharing our expert orchid care tips from the grower, including how to read your orchid's roots, perfect your watering, feed without overdoing it, repot at the right time and encourage your orchid to flower again.
In this guide:
1. How to Read Your Orchid's Roots
One of the best ways to improve your orchid care is to stop relying solely on a schedule and start looking at the plant itself. For a Phalaenopsis orchid, the roots are one of the clearest indicators of what it needs.
Phalaenopsis orchids are epiphytes, meaning that in the wild they grow attached to trees rather than rooted in soil. Their exposed roots are adapted to absorb and hold moisture and nutrients from rain and their surrounding environment, while also helping to anchor the plant.
This is why Phalaenopsis orchids are grown in specialist orchid bark rather than ordinary houseplant compost. The open structure of the bark allows water to drain freely while air circulates around the roots.
The clear growing pot also gives you a useful window into what's happening below the surface.
To learn more read our specialist Root Guide.
What Healthy Orchid Roots Look Like
Healthy Phalaenopsis roots should generally feel firm and plump.
Their colour changes depending on how much moisture they're holding:
- Green roots – there's still moisture present.
- Silvery-grey roots – the roots are drying and the orchid may be ready for watering.
- Bright green root tips – a sign of active new root growth.
- Brown, black, soft or mushy roots – can indicate damaged or rotting roots, often associated with roots remaining wet for too long.
Don't judge your orchid from one root alone. Look at the whole root system, together with the leaves and new growth.
What About Roots Growing Outside the Pot?
Thick roots growing upwards or over the edge of the pot are aerial roots, and they're a perfectly natural part of the way a Phalaenopsis grows.
Don't cut off healthy aerial roots simply because they look untidy, and don't force established roots back into the pot. A firm silvery root with a fresh green growing tip is healthy growth, wherever it happens to be growing.
Lots of aerial roots don't automatically mean that your orchid needs repotting either. The condition of the bark and the roots inside the pot are much better indicators.
🌿 Grower’s Tip
Our growers don't assess an orchid from a single sign. They look at the whole plant.
A healthy Phalaenopsis should have firm, well-hydrated leaves and plump roots that appear green when wet and silvery-grey as they dry. If it's flowering, the blooms should look fresh and any developing buds should feel firm.
Learning to make that quick overall assessment is much more useful than following a rigid care schedule.
Did You Know?
The silvery outer covering of an orchid root is called velamen. This sponge-like layer rapidly absorbs and holds moisture around the root. When it's wet it becomes more translucent, allowing the green tissue beneath to show through – which is why orchid roots appear greener after watering.
And those aerial roots really are designed to anchor the plant. In their natural habitat they attach themselves to surrounding surfaces, and they'll sometimes try to do the same in your home – so keep an eye on particularly adventurous roots growing towards walls or wallpaper!
2. How to Water a Phalaenopsis Orchid
Once you've learnt to read your orchid's roots, deciding when to water becomes much easier.
Phalaenopsis orchids generally need watering around once a week, but this is a guide rather than a fixed schedule. Temperature, light, time of year and the way your orchid is planted will all affect how quickly it dries.
Rather than thinking “It's been seven days, so my orchid needs water,” check the plant first.
Green roots, condensation inside the clear pot, dark damp bark or a pot that still feels heavy all indicate that moisture is present. When the roots become silvery-grey, the bark has dried and the pot feels noticeably lighter, it's usually time to water. These are the same signs our growers use when assessing moisture levels.
In cooler winter conditions, drying can take considerably longer, so you may find your orchid needs watering less frequently.
How to Water Your Orchid
For an orchid in a standard removable pot, we prefer a thorough water-and-drain method.
You can either run water through the bark and roots under the tap or use the dunk and drain method: remove the clear growing pot from its decorative pot, place it into a bowl of water so the bark is submerged, and allow it to soak for a few minutes.
Whichever method you choose, let the excess water drain away completely before returning the orchid to its decorative pot. Never leave your orchid standing in water.
Watering Orchid Arrangements
Orchids planted into bowls, glass containers or arrangements that can't easily be removed need a different approach because excess water can't simply drain away.
Use a small, controlled amount of water and always check whether moisture is still present before adding more.
Ice cube watering can be particularly useful for these arrangements because it provides a measured amount of water in places where the growing pots can be difficult to access. Keep the ice on the bark and away from the leaves and crown.
For standard removable pots, however, a thorough water-and-drain method allows you to wet the whole root system and is our preferred approach.
🌿 Grower’s Tip
The drying period is just as important as the watering itself.
In our glasshouse, orchids are thoroughly irrigated and then the growing environment is managed so the plants dry again. At home, you're aiming for the same basic rhythm:
Water → drain → dry.
Keeping the bark permanently wet reduces the air available around the roots. Overwatering therefore isn't simply about giving an orchid a large amount of water – it's often about watering again before the root system has had time to dry sufficiently.
Keep Water Out of the Crown
When watering, concentrate on the bark and roots. It isn't a problem if the leaves get wet, but avoid leaving water trapped in the crown – the central point where new leaves emerge – or sitting in the leaf joints.
If water collects there, simply absorb it with a piece of kitchen paper.
And there's no need to buy bottled water for your orchid. Ordinary tap water is fine, including in hard-water areas. If your home uses a salt-based water softener, use water from an unsoftened tap instead.
3. How and When to Feed an Orchid
Phalaenopsis orchids don't need large amounts of fertiliser to grow and flower successfully. In fact, when it comes to feeding an orchid, more isn't better.
Because Phalaenopsis naturally grow as epiphytes rather than rooted in nutrient-rich soil, they're adapted to relatively low levels of nutrients. Your orchid can manage for long periods without additional feeding, so we'd always recommend erring on the side of too little rather than too much.
If you choose to feed your orchid, around once every four weeks is plenty for normal home care.
Use a specialist orchid fertiliser according to its instructions. Alternatively, a general houseplant fertiliser can be diluted to around a quarter of its recommended strength.
Feeding is most useful when your orchid is actively producing new roots and leaves. During cooler periods when growth slows, its nutritional requirements will also be lower.
Watch for Too Much Fertiliser
Orchid roots can be sensitive to high concentrations of fertiliser salts. Giving more fertiliser won't make your orchid grow or flower more quickly and can actually damage the root system.
Look out for:
- white, crusty deposits appearing on the bark
- damaged or dying root tips
- unusual root discolouration
- deteriorating roots despite otherwise appropriate watering.
If you suspect a build-up of fertiliser salts, run plenty of clean water through the bark and allow it to drain completely. This helps flush accumulated salts away from the root system.
🌿 Grower’s Tip
If feeding feels complicated, don't worry about it.
Our growers would prioritise healthy roots, appropriate watering and good light over fertiliser every time. Overfeeding can damage delicate root tips, while a healthy Phalaenopsis can manage for a considerable time without additional feed.
Once you've mastered the essentials, occasional feeding can support healthy new growth – but it isn't the secret to making an orchid thrive.
Did You Know?
Fertiliser isn't really 'food' for your orchid.
The plant makes the sugars it needs for growth through photosynthesis, using light, water and carbon dioxide. Fertiliser supplies mineral nutrients that support the processes involved in healthy growth.
That is another reason why more fertiliser doesn't mean more flowers – healthy roots, leaves, light and growing conditions all need to work together.
4. What to Do With an Orchid Flower Spike
When the last flowers fade, your orchid hasn't reached the end of its life. A healthy Phalaenopsis can flower again, and what you do with the old flower spike can influence what happens next.
First, look at the spike before reaching for the secateurs.
If the Flower Spike Is Still Green
Along a healthy green flower spike you'll see small raised bumps covered by scale-like bracts. These are nodes, and beneath them are dormant buds with the potential to produce new growth.
If you'd like to encourage another display from the existing spike, follow it down below the lowest previous flower or flowering branch and cut approximately 1cm above a healthy unused node.
A dormant bud may then develop into a secondary branch, producing another, usually smaller, display relatively quickly.
If the Flower Spike Turns Brown
If the flower spike has completely dried and turned brown, it won't produce more flowers.
Cut it back near the base of the plant using clean, sharp secateurs or scissors, taking care not to damage the leaves or crown.
Your orchid will then concentrate on producing healthy roots and leaves before eventually developing an entirely new flower spike.
Don't worry if this takes time. A Phalaenopsis orchid can take around 6–9 months to flower again, depending on the variety, time of year and growing conditions. Some healthy orchids may even flower twice within a year.
🌿 Grower's Tip
Keeping a healthy green spike and cutting above a dormant node can give you another display more quickly because the orchid is working from an established flower spike.
Cutting the spike back and waiting for an entirely new one takes longer, but allows the plant to return to root and leaf growth before beginning a fresh flowering cycle.
Neither approach is wrong – it depends on the plant and whether you're happy to wait.
Different Phalaenopsis varieties can also behave differently, so don't be discouraged if one orchid reblooms much more quickly than another.
Did You Know?
Temperature plays an important role in flowering.
After a period of healthy root and leaf growth, slightly cooler temperatures can help trigger a Phalaenopsis orchid to initiate a new flower spike. This is one of the techniques we use in our nursery to manage the transition from vegetative growth to flowering.
At home, there's no need to try to recreate glasshouse conditions. Good light, healthy roots and the natural difference between warmer daytime and slightly cooler night-time temperatures can help your orchid through its next flowering cycle.
Want to know what happens next? Read our guide to How to Get Your Orchid to Bloom Again for the complete step-by-step process.
5. When and How to Repot an Orchid
Phalaenopsis orchids don't need constantly moving into larger pots. A mass of roots – particularly aerial roots growing above the bark – doesn't automatically mean your orchid is pot-bound.
As a general guide, we recommend repotting your orchid every 1–2 years, but it's also important to look at the condition of the bark, roots and plant.
Over time, orchid bark naturally begins to break down. As the pieces become smaller and more compact, the growing medium retains moisture for longer and there's less space for air to circulate around the roots.
Fresh bark restores that open, free-draining environment.
Signs It May Be Time to Repot
Look for:
- bark that's beginning to break down or become compacted
- bark that's staying wet for much longer than it used to
- significant dead or rotting roots
- a severely overcrowded root system
- a plant that's becoming unstable in its pot.
- Healthy aerial roots alone aren't a reason to repot.
How to Repot a Phalaenopsis Orchid
Choose a clear orchid growing pot just one size larger than the existing pot and always use specialist orchid bark rather than ordinary houseplant compost.
Carefully remove the orchid from its existing pot and gently work away the old bark. Don't worry about removing pieces that are firmly attached to healthy roots.
Trim away any clearly dead or rotting roots using clean tools, then position the plant in its new pot with the base of the crown level with the top.
Work fresh bark gently around the roots without packing it down too tightly.
Large gaps between pieces of bark are a good thing – they allow air to circulate around the roots.
Where possible, repot after flowering as the orchid moves back into active root and leaf growth. If you discover serious root problems or badly degraded bark, however, don't wait for the perfect moment.
🌿 Grower's Tip
Think of the 1–2 year recommendation as a prompt to inspect your orchid, rather than an automatic date for repotting.
Look through the clear pot. If the roots are healthy and the bark remains open and free-draining, there's no need to rush. If the bark is breaking down, holding water for longer or restricting airflow around the roots, it's time to replace it.
And when you do repot, resist the temptation to choose a much bigger pot. Move up by just one pot size – Phalaenopsis don't need lots of empty space around their roots.
Did You Know?
Repotting an orchid isn't about giving it fresh soil – Phalaenopsis shouldn't be grown in ordinary soil at all.
Replacing old bark is primarily about maintaining the balance of air and moisture around the roots that an epiphytic orchid needs to thrive.
6. Finding the Best Position for Your Orchid
Once you've found a bright position for your orchid, the next step is understanding its microclimate – the conditions immediately surrounding the plant.
Two orchids sitting only a short distance apart can experience surprisingly different levels of light, temperature and airflow.
One might receive slightly more sunshine from a window. Another may be closer to a radiator, doorway or cold pane of glass. These small differences can affect how quickly the bark dries, how the plant grows and even how well it holds its buds.
Adjust With the Seasons
A position that suits your orchid perfectly for much of the year may not be ideal all year round.
During summer, stronger sunlight may mean moving your orchid slightly further back from a window to protect its leaves from scorch.
During the darker winter months, that same orchid may benefit from being positioned closer to the available natural light.
Temperature matters too. Avoid extremes such as hot radiators, open fires and cold draughts, and remember that a windowsill can become considerably colder overnight during winter.
Rather than finding a position and forgetting about it, notice how the conditions around your orchid change throughout the year.
Keep Flowering Orchids Away From Ripening Fruit
There's another environmental factor that's surprisingly easy to overlook: the fruit bowl.
Ripening fruit – particularly fruits such as apples and bananas – releases ethylene gas. Phalaenopsis flowers and developing buds can be sensitive to ethylene, which may cause them to fade or drop prematurely.
Keep flowering and budding orchids away from bowls of ripening fruit.
Be Careful When Your Orchid Is in Bud
Developing buds can also be sensitive to sudden changes in their environment.
If your orchid is happily producing buds, avoid repeatedly moving it between positions with very different temperatures, light levels or humidity.
A sudden environmental change can sometimes contribute to bud blast, where developing buds yellow, shrivel and fall before they have the chance to open.
🌿 Grower's Tip
If one orchid behaves differently from another, don't immediately assume you're caring for it incorrectly.
Even plants of the same variety can respond differently because of small variations in their immediate environment – and because individual plants aren't always identical in the way they grow.
Our growers look at the plant first: roots, leaves, new growth and flowers together. Then we consider what's happening around it before deciding whether anything needs to change.
That's one of the biggest differences between following basic orchid-care rules and really learning to understand your plant.
Did You Know?
An orchid's environment can influence different stages of its growth in different ways.
Bright light supports photosynthesis and healthy root and leaf growth, while a period of slightly cooler temperatures can help initiate flowering. Once buds are developing, however, stability becomes particularly important.
It's a good reminder that expert orchid care isn't about creating one 'perfect' set of conditions – it's about understanding how your orchid responds as it grows.
Expert Orchid Care: Learn to Read the Plant
Once you've mastered the basics, caring for a Phalaenopsis orchid becomes less about following rules and more about observation.
Look at the roots before you water. Notice how quickly the bark dries. Watch for new green root tips and healthy leaves. Learn the difference between an aerial root and a flower spike, and pay attention to changes in the environment around your plant.
Most importantly, don't feel that you need to constantly intervene.
Healthy roots, careful watering, bright indirect light and a stable environment will do far more for your orchid than continually watering, feeding, repotting or moving it.
🌿 Grower's Tip
The best orchid growers aren't necessarily the ones who do the most – they're the ones who observe their plants.
Spend a few moments looking at your orchid each week and you'll soon begin to recognise when it's thirsty, when it's actively growing and when it's preparing to flower again.
Once you can read those signals, you're no longer simply following orchid care instructions – you're beginning to think like a grower.
New to orchid care? Read Orchid Care Tips for Beginners
Finished flowering? Read How to Get Your Orchid to Bloom Again
Need to repot? Read When Should You Repot an Orchid?
Want to understand the full cycle? Read The Lifecycle of an Orchid